Guide
Peptide Crypto Guide: A Simple Way to Buy
Sep
If you have zero knowledge of cryptocurrency and you’d like to use it for online purchases, this is the guide for you!
I’m going to try and keep things as simple as possible: cryptocurrency can be very complicated, but it can also be easy to use.
Understanding different networks and tokens
There are thousands of cryptocurrency blockchains: think of them as being similar to different currencies. Bitcoin (BTC) might be US Dollars, Ethereum (ETH) might be British Pounds, Litecoin (LTC) might be Australian Dollars and so on. When you’re planning to use cryptocurrency to purchase peptides or other goods online, you’ll want to make sure you know what your vendor accepts so that you can buy the appropriate cryptocurrency.
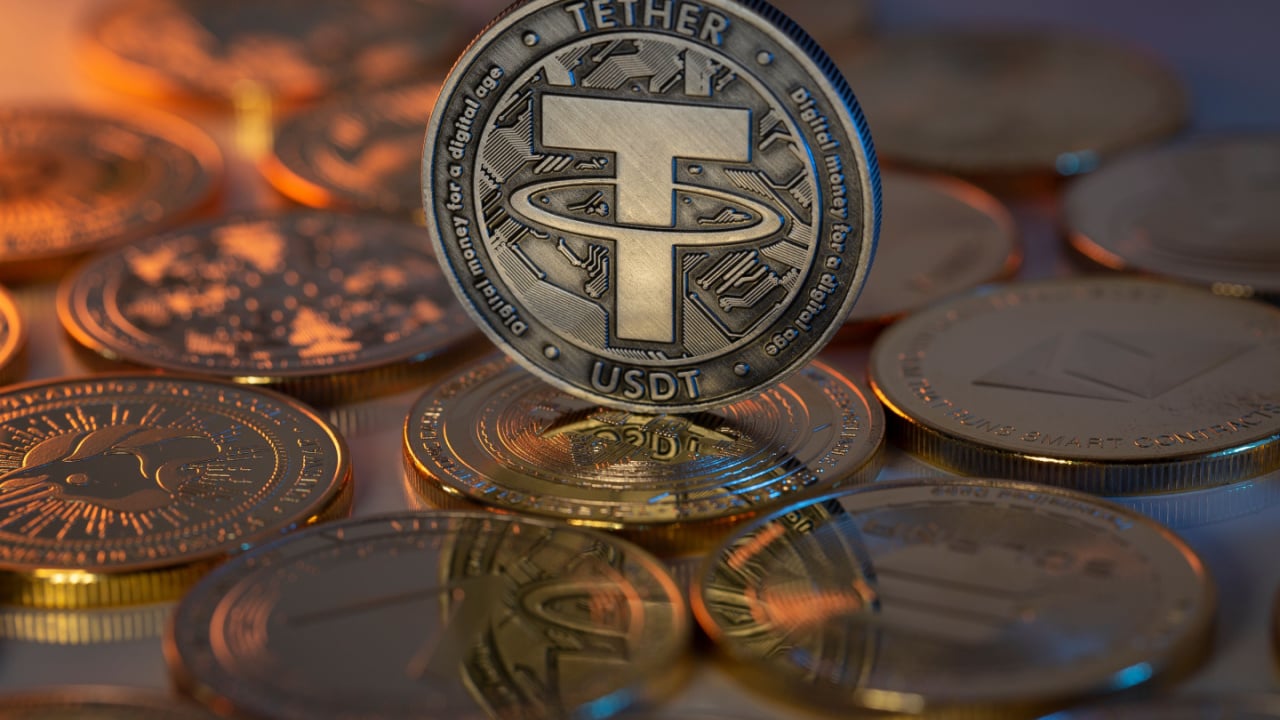
I recommend specifically looking for USDT, which refers to Tether – a cryptocurrency that is pegged to the US dollar. Things get slightly complicated here, but I promise it’ll make sense as you’re doing it.
USDT is available on multiple blockchains: it has its own, as well as tokenized versions on the Ethereum network, Tron, Binance Smart Chain and many others. Most online merchants are going to be more than happy to accept USDT as payment and in particular, via the Ethereum network. You will sometimes see this described as ERC20 USDT. If this is an option, I’d recommend it to newbies. To access USDT on the Ethereum network, you’ll want to first purchase ETH – this is the native currency associated with Ethereum.
Buying ETH with fiat currency
Depending on where you are in the world, you’ll have a number of onramp choices (onramp means turning your fiat currency into cryptocurrency). I recommend searching around, but customers have recommended Exodus’ onramp feature and MoonPay. If you’re in Australia, I recommend BTCMarkets.net. It’s also wise to use Google and double-check all URLs when engaging with crypto: scams are common and you should treat anyone trying to help you – including me – as a potential scammer.
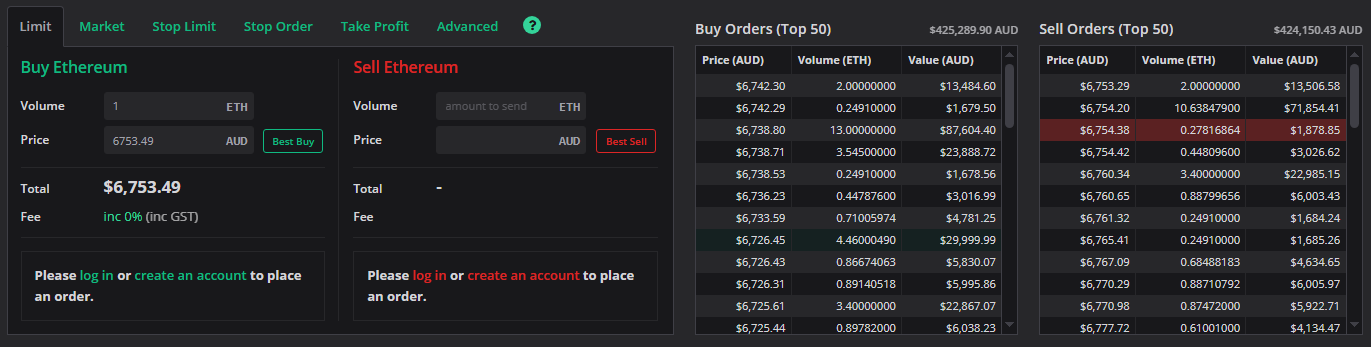
Once you’ve settled on an onramp solution, deposit your fiat currency onto the exchange and swap it into ETH. Most exchanges have an order book – basically, a buy/ask interface. You can put in a ‘sell’ offer for your fiat currency if you want, or you can just immediately buy at the current rate. At most, you’ll spend around 1% of your currency in fees.
Note that buying fractional ETH is totally fine. I’d recommend depositing 10% more fiat than you plan to spend to cover a few fees. For instance, if you plan to spend $200, deposit $220.
Once you have your ETH, it’s time to withdraw it to a wallet that you control.
Withdrawing your ETH to a non-custodial wallet
Cryptocurrency enthusiasts will often tell you that if the keys aren’t yours, the cryptocurrency isn’t yours either. They say this because it’s true. Think of it as being similar to a real bank: they look after your money for you, and generally that’s awesome, but what if you want to spend your money on something the bank isn’t too happy about? That can cause issues! Banks can also be robbed or lose your money via other means – this is far less common than it used to be, but secure crypto exchanges today are secure because dozens of exchanges have lost their clients’ funds over the years. As a result, I recommend taking complete control over your cryptocurrency – this also avoids blocked transfers, which can and do happen routinely with centralized exchanges.
There are hundreds of wallets you can withdraw to – just make sure you follow the instructions to back up your wallet in case you lose your phone, forget your password or something else. If you don’t do this, you run the risk of losing your funds. Complete control over your cryptocurrency comes with the very real downside of it being inherently riskier: your money is completely in your control now.
For wallet recommendations, I like Exodus and MetaMask. Sign up for either, follow the prompts and grab an Ethereum address – treat this like a bank account and never give anyone access to anything other than your public address. Your public address will look something like this:
0x7b023a9b2206781b3c27724B006E56e5e6a338E0
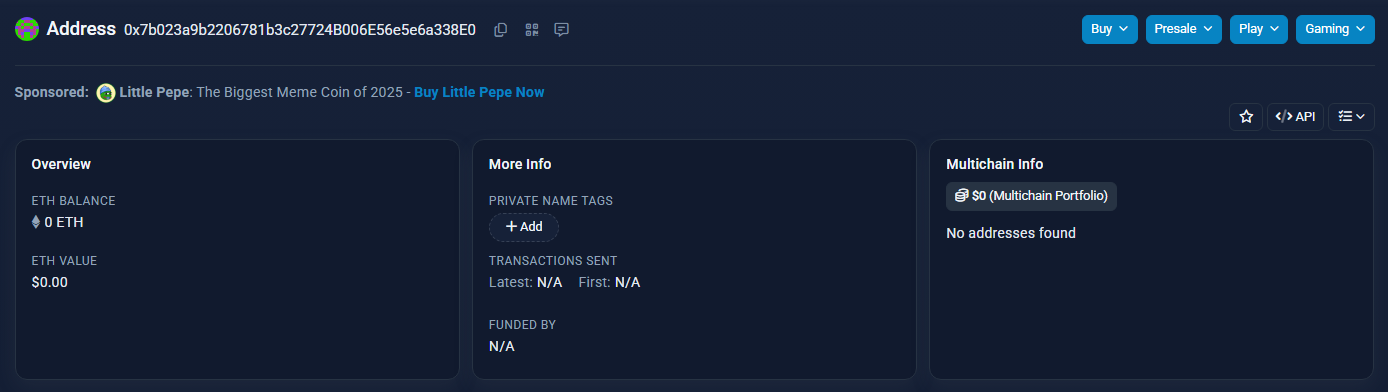
All Ethereum public addresses start with 0x: when you have yours, find the withdrawal function attached to the fiat onramp you picked and initiate a withdrawal to your own address (use copy/paste to avoid mistakes). The process should take less than a minute: refresh your wallet and hopefully, you should see your ETH in there. If you want to test with a small amount first, this is encouraged.
Swapping your ETH into USDT
Once you have ETH in your wallet, you’ll want to switch it into USDT. Most wallets have this as an in-built feature and charge a small fee (less than 1%) for providing the service. You can also use a decentralized exchange tool for this purpose: UniSwap and 1inch are my recommendations. The interface should be intuitive – select ETH as what you’re swapping and pick USDT as your desired currency. Note that the swap will require you to use some ETH as a fee: you’ll want to leave a little behind to send the USDT after too.
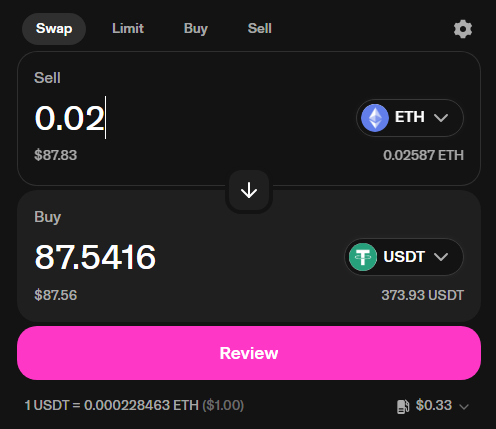
Above, you’ll see that I’m swapping 0.02 ETH (worth $87.83 USD) into 87.54 USDT – I’ll also need to pay 33 cents of ETH (bottom right) for the swap. This is quite a low rate and depending on how busy the network is, you might need to pay more.
Your wallet will prompt you to confirm a few things – as long as you’re on the legitimate decentralized exchange websites, you can trust these prompts. When the swap is complete, it’s time to send your USDT!
Sending your USDT
This is the last step: when asked for a payment, make sure you get the Ethereum address that they want you to send USDT to (use copy/paste to avoid mistakes). Your wallet will then allow you to enter that address and an amount of USDT – approve the transfer and hit send – it’s really that easy! You should receive a transaction hash which looks similar to an address, but is longer:
0x45fe1d104e08c17a1832f06081c2f4cb0d46616d40878cdbde79dd645fb7eeef
You can send this to the merchant as proof that you’ve paid for your product. Note: once your transaction has gone through, there’s no getting it back. So be sure when you hit send!
That’s it: you’ve now made your very first crypto purchase (hopefully for peptides!).
Other considerations
Aus Aminos currently uses a third-party tool to assist with cryptocurrency payments that should make the process more convenient for you. You can pay with dozens of currencies and the tool will manage conversions on your behalf, so feel free to just send ETH instead of swapping it into USDT. I also recommend XRP – a completely separate cryptocurrency – as an alternative. Fees are essentially non-existent and transactions are very, very quick.
If you have any questions, feel free to leave a comment or even reach out to us via email. Though please – be skeptical of anyone giving you crypto advice and as always, assume everyone’s out to get you.